Update: I made a demo of the Personal Weather Station page here.
Git: https://github.com/adamcodes716/media-watched-history (same code base as the Media Watched app).
As mentioned in other posts I am always interested in trying to integrate my personal geeky projects with my work life. One of my hobbies is weather. To be more specific, the ability to procure data from a data point (backyard weather station, pool, etc) at any time for no good reason at all. I have something similar running on AWS but I thought I would do something similar in Angular.
Before starting on this little project I thought that I would take a look out there and see if anyone had done something similar. My goal with this is to just mess around for a bit before starting my next project (a dashboard app integration to trakt.tv). Sure enough, there were a few projects out there but most were written in AngularJS or were written a while ago. I found this neat little tutorial and decided to give it a go. My goal was to take what this dev had done and extend it so it could be used with weather.com api that contains my personal backyard weather station. Along the way I’d play with some of the items that currently interest me.
First things first, if you’re going to play along at home you will need to go through that guide to get to the starting point. Please note that the guide as constructed won’t work. You will need to go into the first step in my guide blow.
Updates to the Guide
The biggest problem with the current guide is that the api referenced in the guide (APIXU) no longer exists. If you open up their URL you will see that you are directed to weatherstack.com. After a little pocking around I realized that this is a completely new API because the returned values did not match with what exists in the guide.

The apixu.service.ts file needs to be updated accordingly:
import { Injectable } from '@angular/core';
import { HttpClient } from '@angular/common/http';

const urlKey = 'YOUR_KEY';
const urlUnits = 'f';   // use m for metrics

@Injectable({
  providedIn: 'root'
})
export class ApixuService {


  constructor(private http: HttpClient) {}
  getWeather(location){
      return this.http.get(
        'http://api.weatherstack.com/current?access_key=' + urlKey + '&units=' + urlUnits + '&query=' + location
      );
  }
}
As you may have noticed I added the units parameter so that you have the choice in the return data being Fahrenheit or Celsius. I also separated out the key for easier editing. We then need to address the issue of the different properties being returned by the weatherstack api (their guide is here).
At this point I had another problem – I was getting an error that referenced a CORS / Origin error. The browser did not like that I was trying to call another domain from my localhost domain. I tried to install a proxy in the code but had problems getting that working. Rather than spending any more time on it I simply installed “CORS Unblock” extension for Chrome and moved on with it. If this were prod I would have fixed the issue on the server but that’s not an option in webpack.
<div class="col-md-6">
<h3class="text-center my-4">Weather Details:</h3>
<pclass="text-center">
        Current weather conditions: {{ this.weatherData?.current.weather_descriptions  }} <br/><imgsrc={{this.weatherData?.current.weather_icons}}>
</p>
<pclass="text-center">
        Temperature: {{ this.weatherData?.current.temperature }} degrees {{ this.weatherData?.request.unit }}
</p>
<pclass="text-center">
        Feels like in: {{ this.weatherData?.current.feelslike }} degrees {{ this.weatherData?.request.unit }}
</p>
<pclass="text-center">
        Location Searched: {{ this.weatherData?.location.name }}, {{
        this.weatherData?.location.country }}.
</p>
</div>
And there you have it – summer is never coming.
Create a Weather Underground Component
Rather than muddying the water by putting more fields on the same page lets create a brand new page for our PWS (personal weather station) values.
Go back into your project and issue this command to generate the pws component.
ng g c componentAnd you should get a result that looks like this (sizes will vary, of course).

We now need to add the new component to routes.ts. The default URL will continue to route to the Weather component and now inserting /pws will bring us to the new pws component.
import { Routes } from '@angular/router';
import { WeatherComponent } from './weather/weather.component';
import { PwsComponent } from './pws/pws.component';


export const allAppRoutes: Routes = [
  { path: '', component: WeatherComponent },
  { path: 'pws', component: PwsComponent }
];Setting up the User Interface
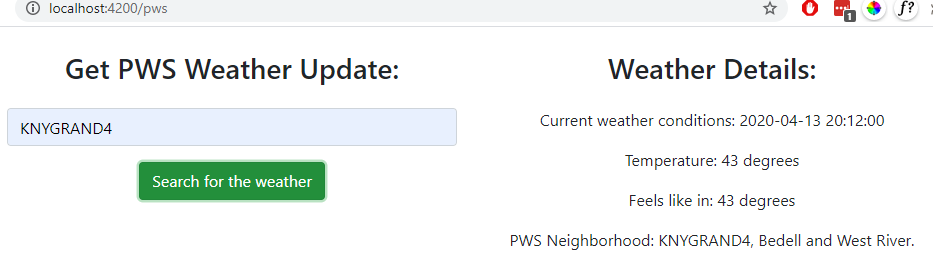
This is pws.component.html. In order to search this api you will need to enter in a station ID. My personal station ID is KNYGRAND4.
<div class="container">
    <div class="row">
      <div class="col-md-6">
        <h3 class="text-center my-4">Get PWS Weather Update:</h3>
        <form
          [formGroup]="weatherSearchForm"
          (ngSubmit)="sendToAPIXU(weatherSearchForm.value)"
        >
          <div class="form-group">
            <input
              class="form-control"
              type="text"
              id="weatherLocation"
              aria-describedby="weatherLocation"
              placeholder="Enter a PWS Station (e.g. KNYGRAND4)"
              formControlName="location"
            />
          </div>
          <div class="text-center">
            <button type="submit" class="btn btn-success btn-md">
              Search for the weather
            </button>
          </div>
        </form>
      </div>
      <div class="col-md-6">
        <h3 class="text-center my-4">Weather Details:</h3>
        <p class="text-center">
          Current weather conditions: {{ this.weatherData?.observations[0].obsTimeLocal }}
        </p>
        <p class="text-center">
          Temperature: {{ this.weatherData?.observations[0].imperial.temp }} degrees
        </p>
        <p class="text-center">
          Feels like in: {{ this.weatherData?.observations[0].imperial.windChill }} degrees
        </p>
        <p class="text-center">
          PWS Neighborhood: {{ this.weatherData?.observations[0].stationID }}, {{
            this.weatherData?.observations[0].neighborhood }}.
        </p>
      </div>
    </div>
  </div>
The api can return several different entries. Since the newest data is the first entry we will use subscript zero to get the freshest data.
Setting up the API Call
We need to add a new method for this call. Since we already have such a method in apixu.service.ts (and it is already set up for use) we can simply add it there
  getPWSWeather(location){
    return this.http.get(
      'https://api.weather.com/v2/pws/observations/current?stationId=' + location + '&format=json&units=e&apiKey=<YOUR_KEY>'
    );
}
and then edit pws.component.ts
import { Component, OnInit } from '@angular/core';
import { FormBuilder, FormGroup } from '@angular/forms';
import { ApixuService } from '../apixu.service';


@Component({
  selector: 'app-pws',
  templateUrl: './pws.component.html',
  styleUrls: ['./pws.component.css']
})
export class PwsComponent implements OnInit {
  public weatherSearchForm: FormGroup;
  public weatherData: any;

  constructor(
    private formBuilder: FormBuilder,
    private apixuService: ApixuService
  ) {}

  ngOnInit() {
    this.weatherSearchForm = this.formBuilder.group({
      location: ['']
    });
  }
  sendToAPIXU(formValues) {
    this.apixuService.getPWSWeather(formValues.location).subscribe(data => {
      this.weatherData = data;
      console.log(this.weatherData);
    });
  }
}
So once again we subscribe to the result of the web service call. Upon receipt of the data the data fields are populated.
And the result. There are also some other api’s for forecasts and other data – I may add new pages at a later date.


[…] Virtual Weather Station – communicates with my backyard weather station. Uploads stats to various sites where I can access via api calls and Alexa (demo here). […]
[…] Alexa to find out anything from the wind speed outside to the thermostat temperature inside (see this demo to pull back live data from my PWS). I already had an AWS node.js lambda function set up […]